
You should integrate your Kubernetes Cluster with Gitlab + Helm
You should integrate your Kubernetes Cluster with Gitlab + Helm

A lot of people know Gitlab because of it's CI/CD. What you may not know is that Gitlab has a lot of features that will make your life a lot easier.
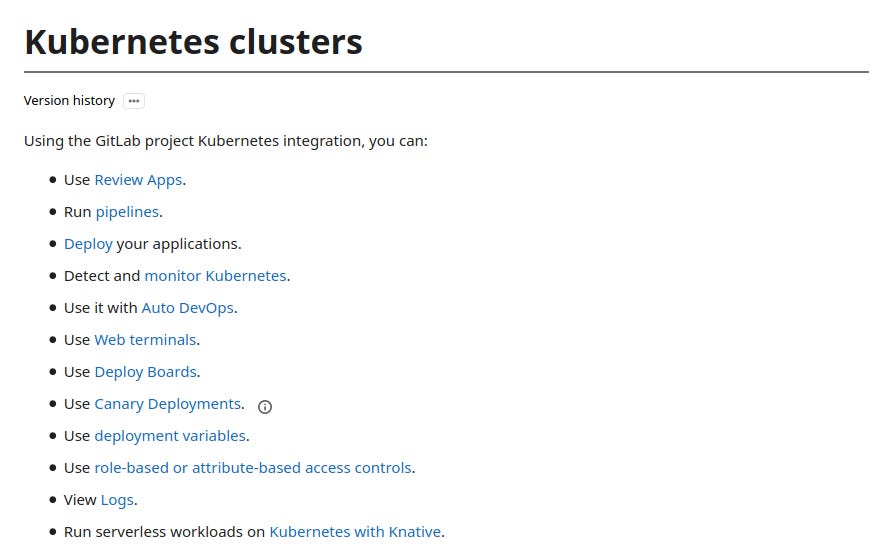
One of them is the capability to integrate a Kubernetes Cluster on your group or project. Check on the picture below what you can do when you integrate K8S with Gitlab:
How-to Integrate
It's quite simple actually. You have two options: You can create a cluster via Gitlab on GCP or AWS, or you can add an existing cluster using the cluster certificate. In this post, I will use the latter.
When you click on the tab to add an existing cluster you have some fields to fill up.
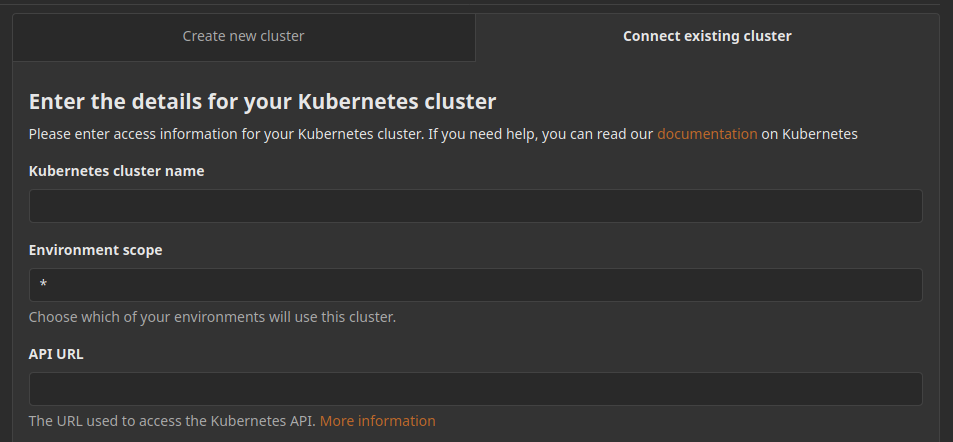
The first is the name of the cluster that will identify it on the Kubernetes dashboard inside Gitlab.
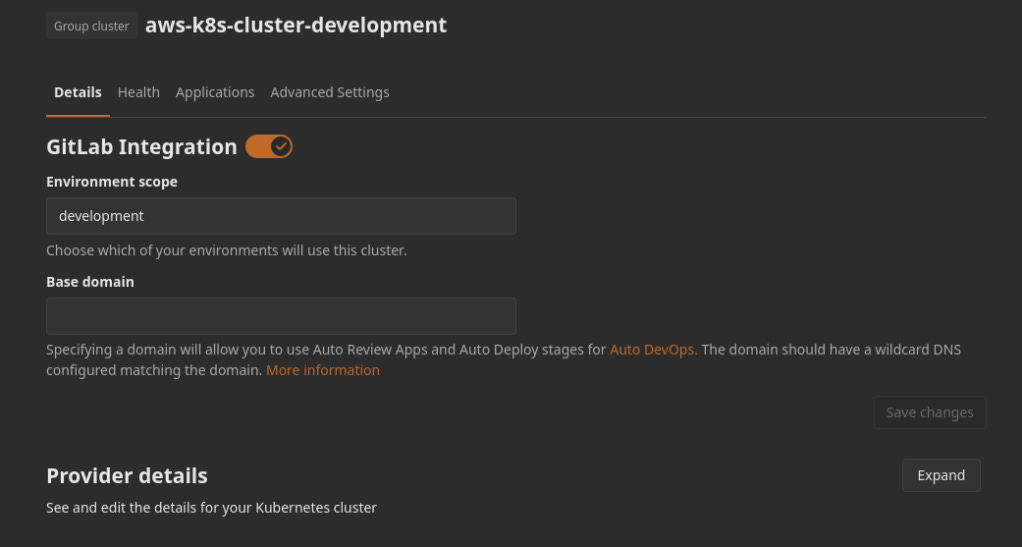
The second is the Environment scope. This one is a special one. AS you ay know when you are creating a .gitlab-ci.yml you can define in which environment the job will build/deploy/whatever your application. And when you integrate a cluster, you this field to define in which cluster your application will be deployed. For now, we leave as the default wildcard *.
The third is the API URL. That is the public URL of your Kubernetes cluster that is probably available on the details page of the cluster on your cloud provider.
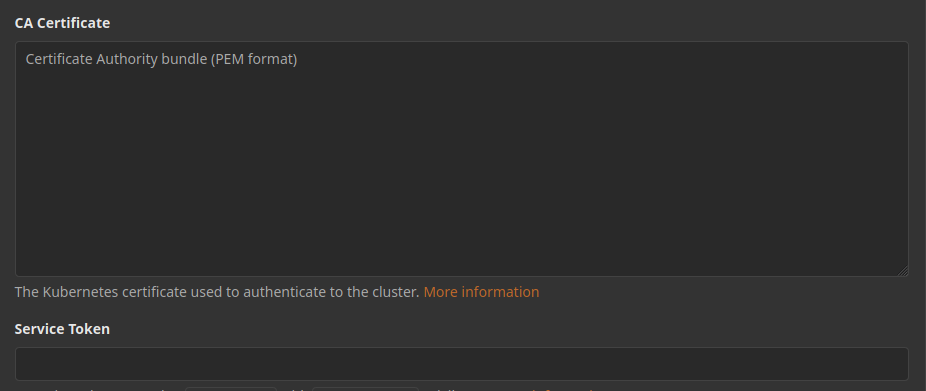
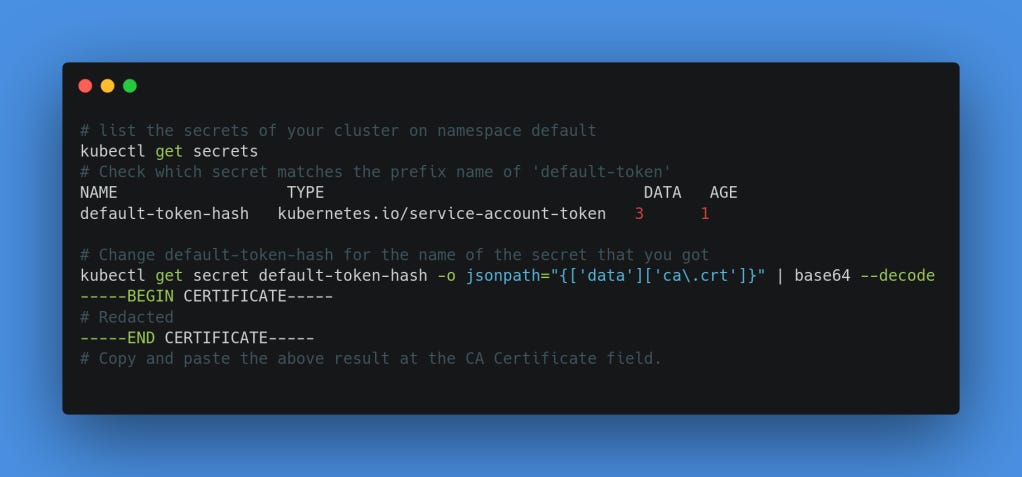
The fourth field is the CA Certificate. Every K8S cluster that you create has a certificate. You need to get this info via kubectl or on the details page of the cluster. I will replicate the command that Gitlab suggests on its documentation.
The fifth and last field is the Secret Token. For this one, you need to create a service account with admin rights for Gitlab. The yaml that will do that for you follows:
apiVersion: v1
kind: ServiceAccount
metadata:
  name: gitlab
  namespace: kube-system
---
apiVersion: rbac.authorization.k8s.io/v1beta1
kind: ClusterRoleBinding
metadata:
  name: gitlab-admin
roleRef:
  apiGroup: rbac.authorization.k8s.io
  kind: ClusterRole
  name: cluster-admin
subjects:
  - kind: ServiceAccount
    name: gitlab
    namespace: kube-system
Apply it with kubectl apply -f filename.yml. Now with the command on the box below, you are able to get the Service Account token to fill this last field. This is where I think that the integration has it's first win, because after you fill this value and save it, the token is not available on the details of the cluster integration, and you will not need to configure any K8S config file to deploy into the cluster, and maybe leave secrets with too many permissions on a Variables config and have some security breaches for this. To view/manage group-level Kubernetes cluster you need the role of Owner or Maintainer.
kubectl -n kube-system describe secret $(kubectl -n kube-system get secret | grep gitlab | awk '{print $1}') 
Last but not least, you have a few checkboxes to analyze.
The first is related to RBAC permissions. I set this one checked to further use the power of the integration.
The second is Gitlab-managed cluster. This one I uncheck it because it gives a lot of headaches when you are trying to deploy an application in a specific namespace and Gitlab just overrides it with a custom namespace that it creates on the pipeline. Check the docs for more info.
The third is Namespace per environment, this makes a namespace for the target environment defined on the CI.
And that's it. Add it and you should be redirected to this page that has the details of the integration:
Further wins
Gitlab Runner
When you have a Gitlab account, your organization has only 400 CI/CD minutes. That doesn't hold a software pipeline for a week. The alternative is to pay Gitlab(and that can be expensive because you pay for the user on the organization), that you can go for 2000 CI/CD minutes on the Starter plan or buy 1000 minutes per $10 or configure your own runners. So you just go on the Applications page, and find this little one, and hit install:

And after a couple of minutes, you have a Gitlab Runner installed on your cluster available to run your jobs without worrying about the minutes limit.

Prometheus
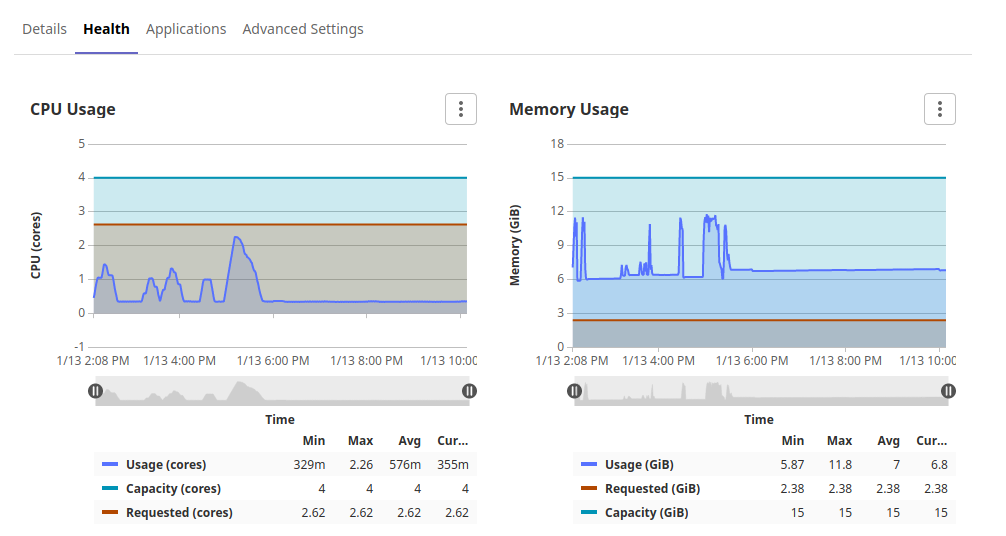
On the Applications page you can find a lot of services that Gitlab already offers to you to install on your cluster. Another one handy is Prometheus. Most of you will use the Prometheus Operator stack for monitoring and seeing the data on Lens or Grafana. But for day to day use Gitlab can show you some info about the healthy of your cluster. Just hit the install button for Prometheus. After a couple of minutes you can go to the Health tab and see the use of CPU/Memory of the cluster:
After your first deployment of an application in some environment, you can access the Operations > Metrics tab information about your pod.
The CI integration + Helm
Now you have your cluster configured. You have defined that your cluster will be available only for the development environment. Now you start to write your .gitlab-ci.yml file to use helm to deploy your application chart on the cluster. However, you start to wonder: How I will authenticate on the cluster? If I have more than one cluster how do I define which one to use?
No worries. Gitlab does the magic. If you configured the cluster to use one environment, as in our example it's development, and then you define a job that uses the development environment, Gitlab automatically makes available on the CI the credentials needed to authenticate on the target cluster. No need to configure kubeconfig or anything else.
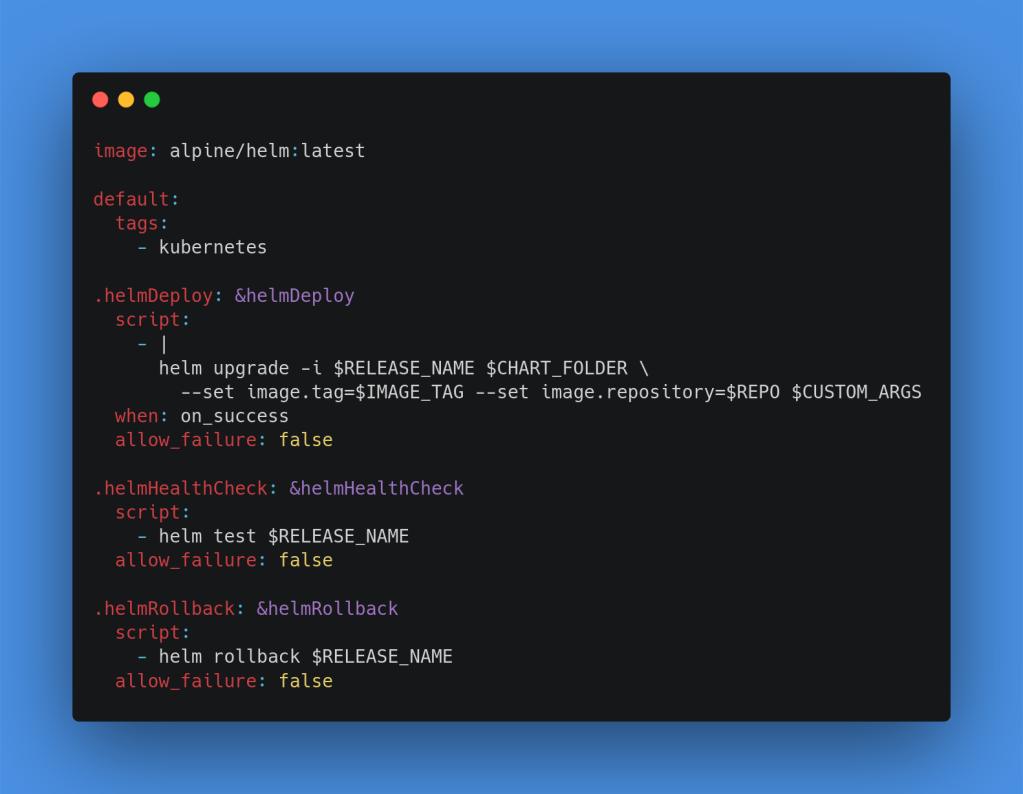
On the sample of the code below, I have defined some hidden jobs as templates to be used on a Kubernetes pipeline that uses Helm Charts.
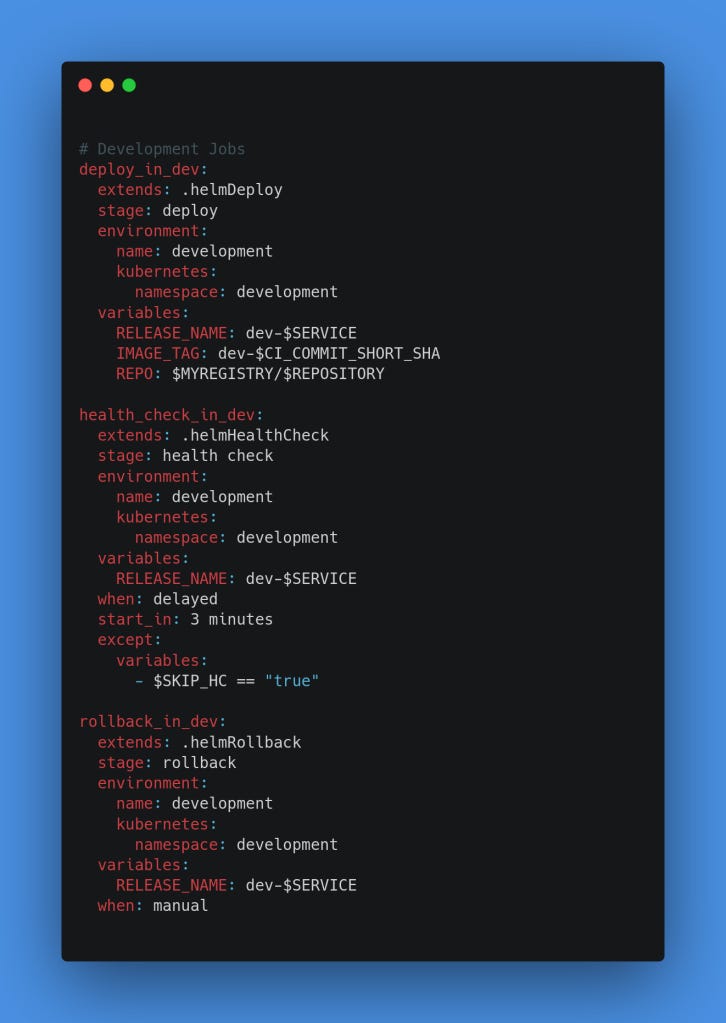
And here, I have the jobs defined targeting the development environment.
And that's it. Run the pipeline and see if your new release gets deployed successfully. If don't, feel free to contact me.
The source code of the HelmJobs.yml it's available on the ci-templates repository properly documented.